Understanding how your image is printed and stretched onto a canvas frame helps you get the best result.
The front is the main visible area of your canvas — the part you see when the print hangs on your wall. This is where the most important part of your image should be. When you choose a print size (for example 16×20″), the front face dimensions correspond to that size.
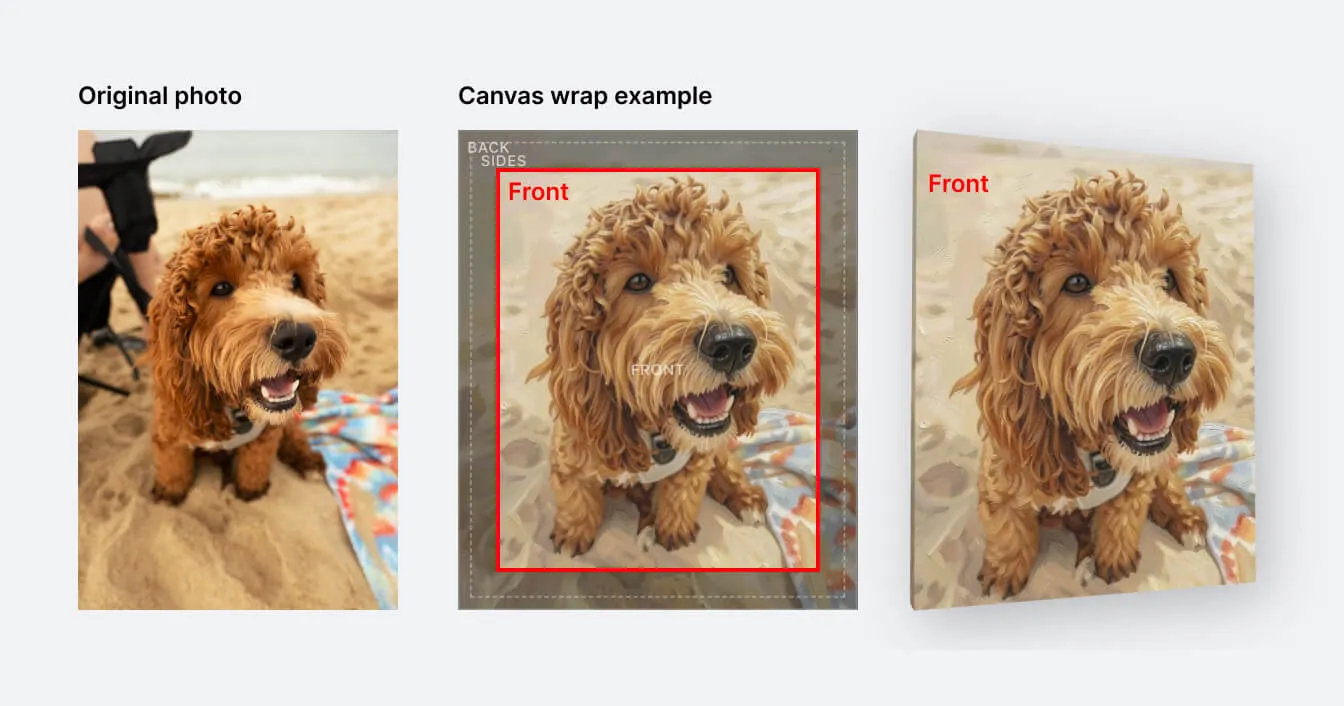
Canvas prints are stretched around a wooden stretcher frame. The edges of your image wrap around the sides of this frame — about 49 mm (roughly 2″) on each side. This means the printed image is actually larger than the front face: it includes extra material that folds over the edges.
The side wrap consists of two parts: 34 mm of visible side depth and 15 mm that folds onto the back and is stapled to the frame. The sides are still visible when viewed at an angle, so they contain a continuation of your image rather than a blank border.
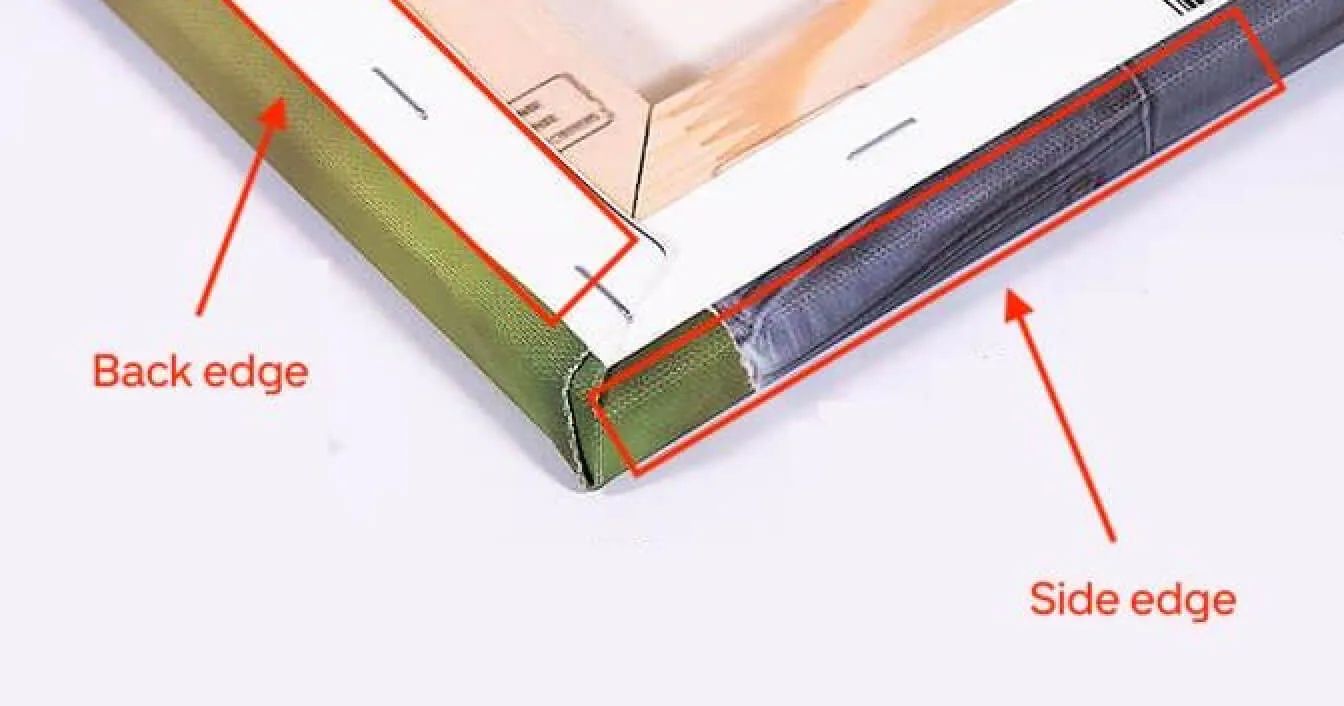
The back of the canvas is where the material is folded over and stapled to the stretcher frame. This part is not visible once the canvas is hung. The wooden frame provides structure, and a hanging mechanism is attached so you can mount it directly on your wall.
Because the sides need extra image material to wrap around the frame, the visible front area is slightly smaller than the full printed image. Your image is automatically cropped to fill the canvas — the center of the image is shown on the front, and the edges wrap around the sides.
How much gets cropped depends on the canvas size. Smaller canvases (like 8×10″) lose a larger percentage to the wrap because the 49 mm side depth is a bigger fraction of the total area. Larger canvases (like 24×36″) lose proportionally less.
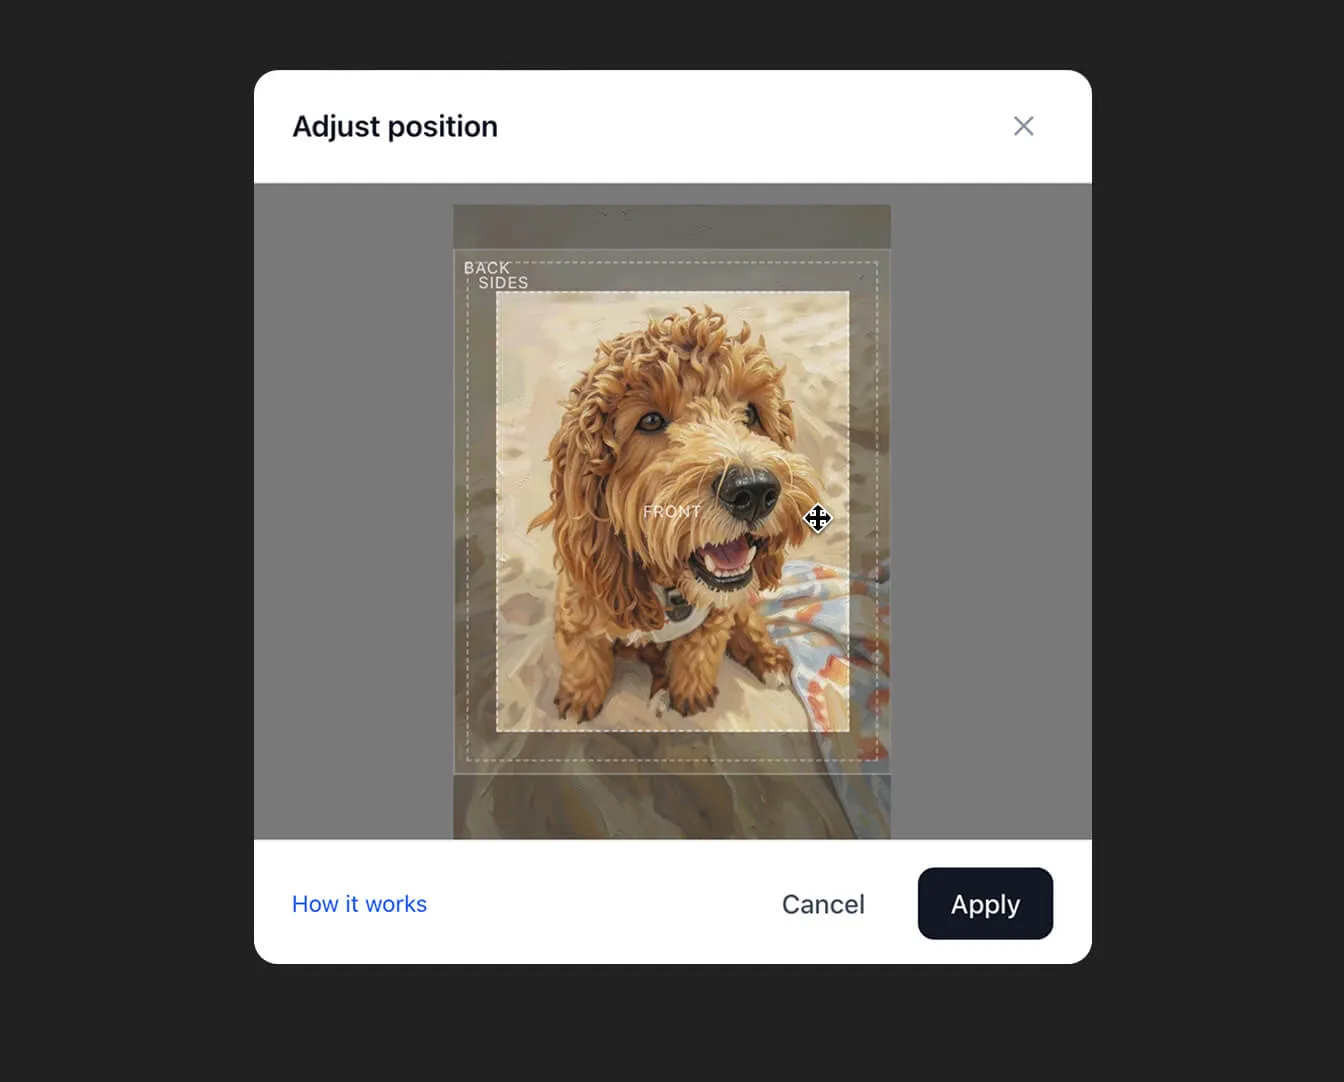
The Adjust tool lets you control exactly which part of your image appears on the front of the canvas. You can drag the image up or down to reposition the visible area, or pinch to zoom in.
Inside the Adjust modal, you’ll see a dashed rectangle labeled “Front” showing the area that will be visible on the canvas face. The outer zone labeled “Sides & back” shows what wraps around the frame edges (34 mm visible side depth) plus the small strip (15 mm) that folds onto the back and gets stapled down. This helps you make sure important details stay safely within the front zone.
When you place an order, your image is upscaled to high resolution using AI (Real-ESRGAN 4x) to ensure sharp, detailed prints even at large sizes. The image is then formatted to include the front face plus the wrap edges, and sent to our print partner for production.
The final printed sheet is stretched over the frame by hand, with the edges folded and stapled on the back. Each canvas is quality-checked before shipping.